Generate (Ctrl+G)
This powerful command allows you to generate copies of the whole or parts of the model while automatically taking care of node numbering and offsets. Its power is best illustrated by an example.
During “Generate” command execution, CAEPIPE issues a warning and stops when it encounters a Node number that already exists.
Example 1:
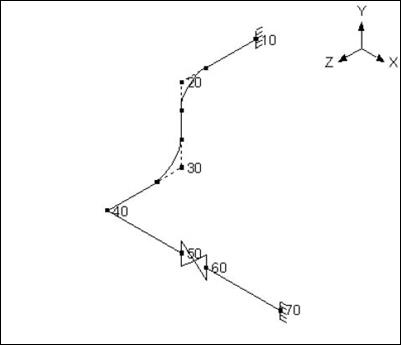
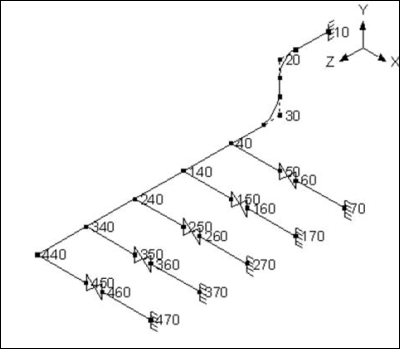
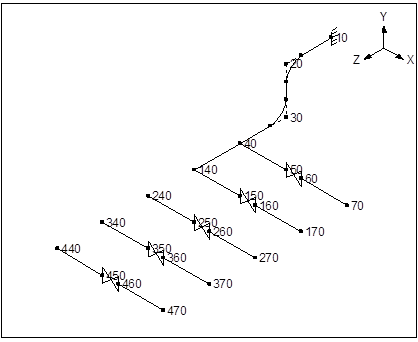
Assume that we want to go from the model shown in the first figure to the one shown in the second figure. There are two ways to reach the result. The first is by manually modeling every line like shown in the second figure. The second is the faster way using the Generate command, as you will see.
Summary of using the Generate command for the example:
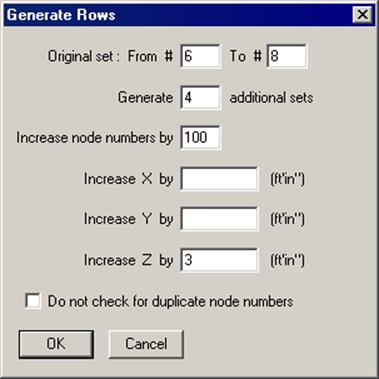
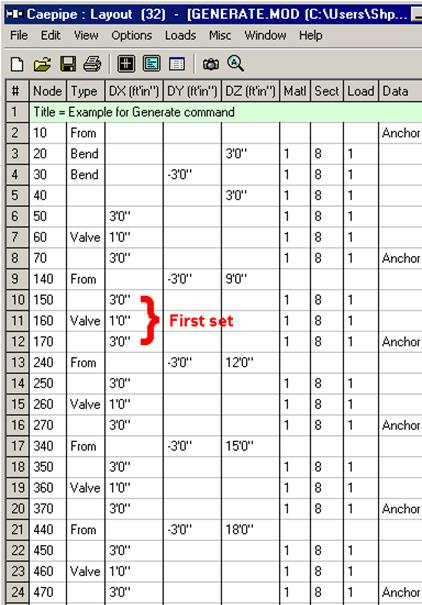
1. First identify the part of the model that repeats and model it. In this case, it is the part comprising of nodes 40 to 70 (rows 5 to 8).
2. Next, use the Generate command to create four additional branches, each starting with say 140, 240, 340 and 440 (these node numbers could be any numbers).
3. Then, create one connecting element (from node 40 to 140).
4. Further generate three additional connecting elements.
That is it. A number of figures follow to depict the above process pictorially.

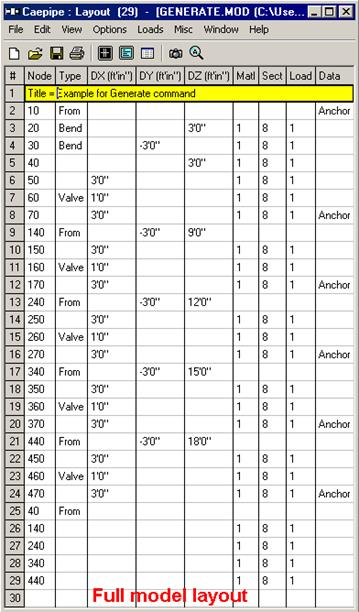
The above window shows the layout for the starting point of the model. Use the Generate command.
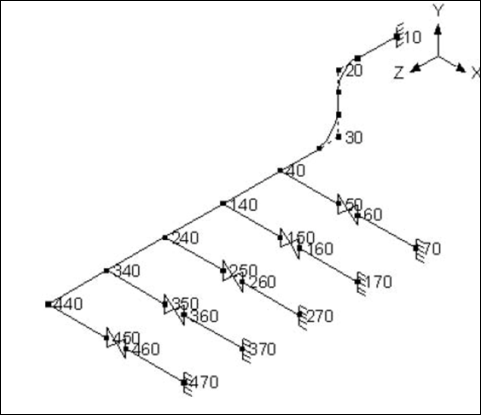
Notice the four sets that are generated (only the first one marked in the following figure).
Look at the graphics that corresponds to the above Layout window.
Next, create one connecting element between 40 and 140, and generate the remaining three.

Type 40 on an empty row, Tab to Type, press “F” for “From,” press Enter (rows 25 and 26 above). Now, generate the rest.

Final model as shown is the desired result. So, as you saw, Generate command allowed us to create four branch lines from one existing line in three operations.
Example 2:
See example under Beam section in the Technical Reference Manual (Example 1: Pipe Rack using Beams)