Paste (Ctrl+V)
Once you have copied a row through Ctrl+C, move your cursor to the location where you want to paste the copied information and press Ctrl+V (or select Edit menu > Paste). If you want to paste the entire row, move the cursor to the Node column of the row where you will be pasting. To paste an individual part of a copied row, move the cursor to the specific column within the row where you wish to paste the specific datum. The copied information is available for only one operation. Also, note that when an entire row is pasted, it will overwrite the existing row (if present). See Example 1 for further details. To update / refresh the Graphics window after paste, save the model and use the command “Redraw” available through Graphics window > View.
If you have copied a segment consisting of multiple rows through Edit menu > Copy (and NOT through Ctrl+C), move your cursor to the location where you want to paste the copied information and press Ctrl+V (or select Edit menu > Paste). See Example 2 below for further details.
Note:
If you wish to copy and paste a row multiple times, then invoke Copy command through “Edit > Copy” and enter the From # and To # as the desired row # and turn ON the option “Remember for multiple paste”.
Node numbers for the elements pasted will be generated based on “Node increment” defined through Layout Window > Options > Node increment.
Node number for “Location” element is assigned the same node number as the preceding element whose type is other than “Comment”.
Example 1: Copy and Paste a Single Row
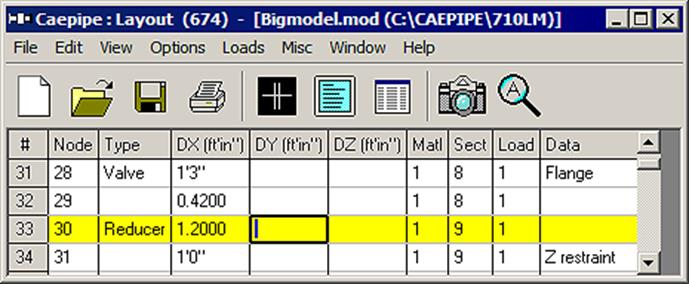
To copy the row at #33 (30, Reducer, 1.2ft, , ,1, 9, 1, ), you may position the cursor anywhere on that row before you invoke the Copy command. But, to paste ALL of this information, you must position the cursor under the Node column of a (new) row.
If you want to paste, however, only the type ‘Reducer’ then place cursor under Type, only for DX of 1.2’, place cursor under DX, and so on.
Example 2: Copy and Paste a group of elements (multiple rows) including their Data in Layout
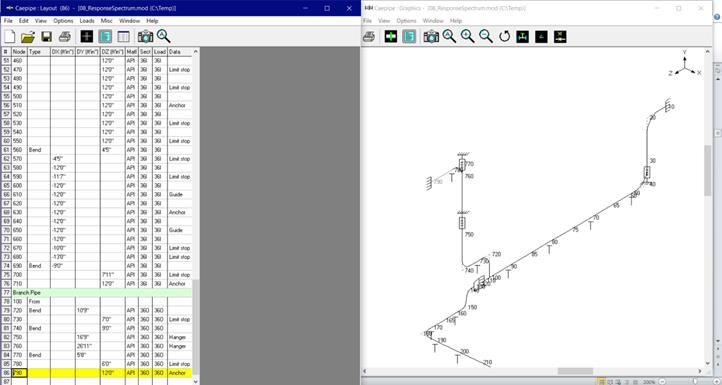
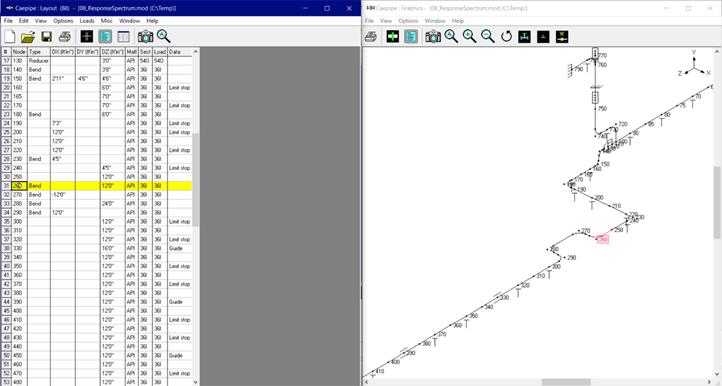
This example shows how to Copy a branch pipe starting at Node 100 and ending at Node 790 and Paste the same at Nodes 65 and 75. Sample model used in this example can be downloaded from here.
1. Navigate in the layout window where the brach pipe layout information is defined as shown in the figure below.

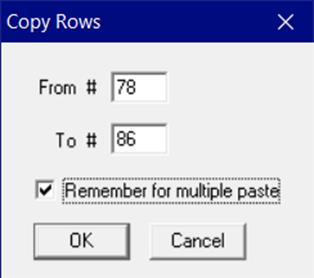
2. Invoke the Copy command through Layout Window > Edit (and NOT using the shortcut Ctrl+C). Enter the From # as 78 and To # as 86. Turn ON the option “Remember for multiple paste” to paste the segment multiple times in the layout.
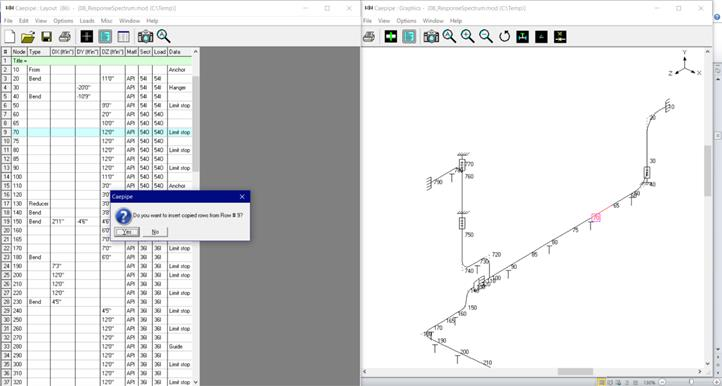
3. To Paste the branch pipe copied at Node 65, position the cursor at Row # 9 (after Node 65 definition) and press Ctrl+V. When done, you will see a message as shown below as you are inserting the copied rows in the middle of the layout. Press “Yes” to accept.
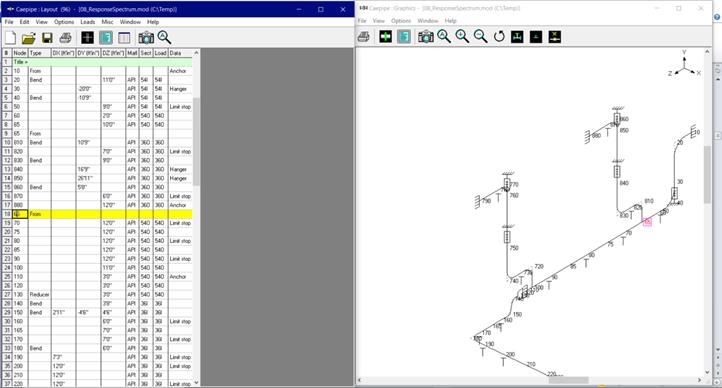
4. In the figure shown below, you will observe that the new branch is inserted with Node numbers from 800 through 880 (rows 9 through 17). Now, to position the branch pipe at Node 65 properly, change the Node Number at row # 9 as 65 and insert a new row at row # 18 with Node number as 65 and Element type as “From” at both row # 9 and row # 18 as shown below.
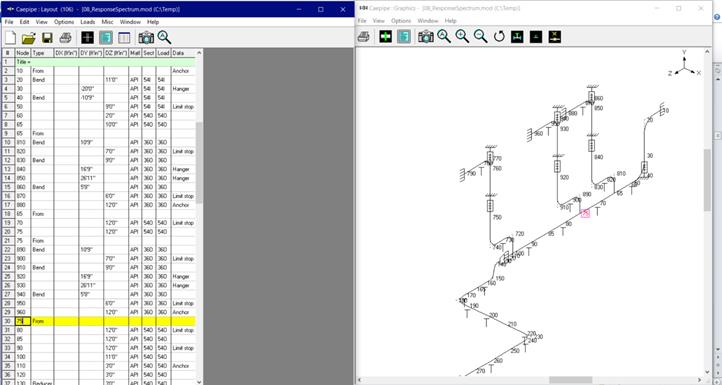
5. Similarly, to Paste the branch pipe at Node 75, position the cursor at row # 21 (after Node 75 definition) and press Ctrl+V. Accept by pressing “Yes”.

6. Now, to position the new branch at Node 75, change the Node Number at row 21 as 75 and insert a new row at row # 30 with Node number as 75 and Element type as “From” for both row # 21 and row # 30 as shown below.
Example 3: Copy and Paste a Loop multiple times in Layout
This example shows how to add a Loop to the existing layout and Copy & Paste the same loop multiple times (say at Node 340 and at Node 400). Sample model used in this example can be downloaded from here.
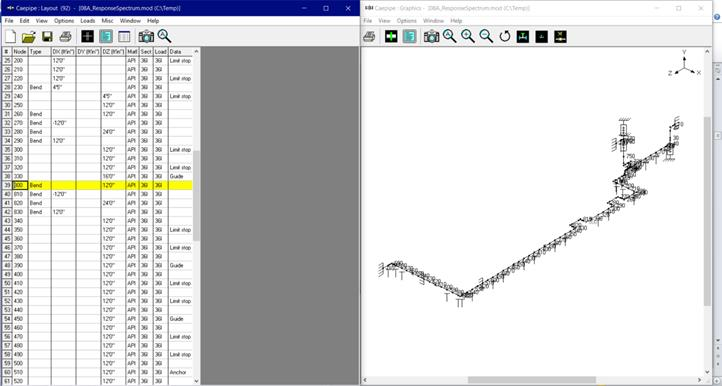
1. Edit the existing layout and add a loop at Node 260 (row 31) as shown below.

2. Invoke Copy command through Edit menu > Copy. Enter the From # as 31 and To # as 34. Turn ON the option “Remember for multiple paste”.
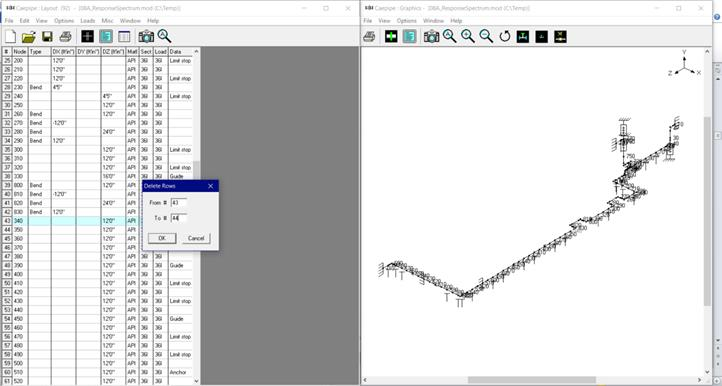
3. Now, to insert the loop at Node 340, position the cursor at row 39 and press “Ctrl+V”.
4. Delete the rows 33 and 34 (Nodes 340 and 350) as they are already replaced with loop through Edit > Delete as shown below.
5. Similarly, to copy the same loop at Node 400, position the cursor at row # 47 (Node 400) and press “Ctrl+V”.
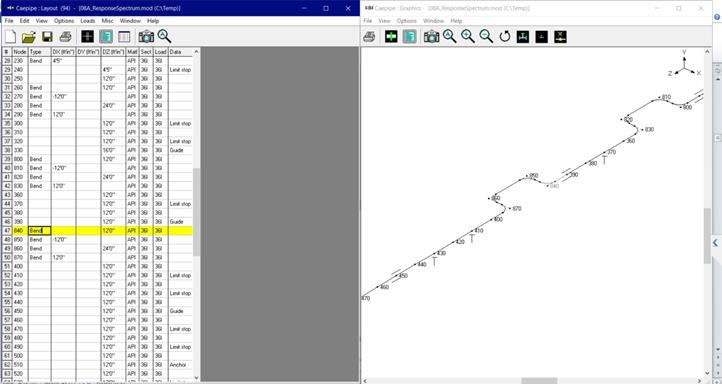
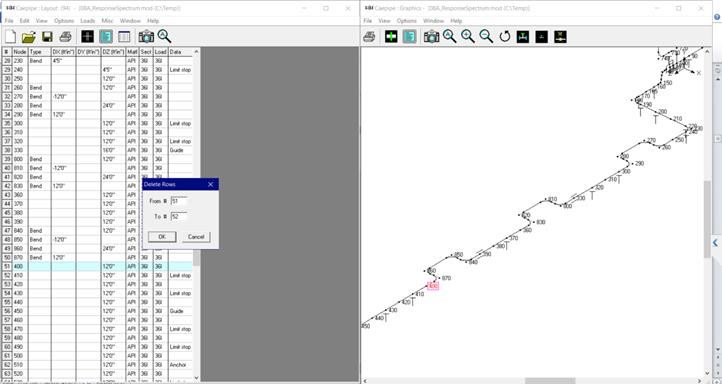
6. Delete the rows 51 and 52 (Nodes 400 and 410) as they are already replaced with loop throussssgh Edit > Delete as shown below.
Example 4: Copy and Paste a Section / Material / Load via List Window
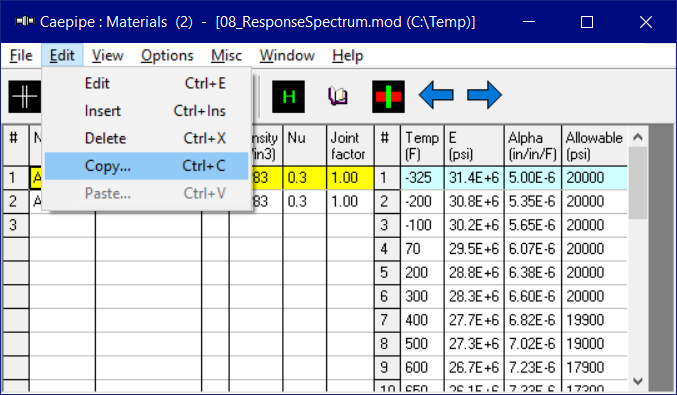
To copy a Section / Material / Load, position the cursor in the required row and invoke the Copy command through List window > Edit > Copy or press “Ctrl+C”.
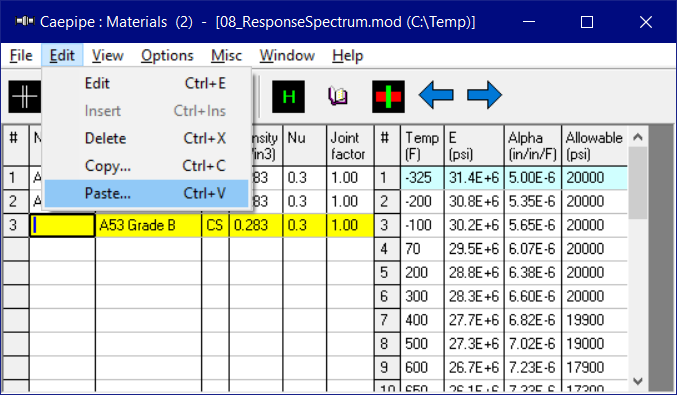
Now, to paste the row copied, you must position the cursor at an empty row where you wish to copy and invoke command through Layout Window > Edit > Paste or press “Ctrl+V”. When done, enter the desired material reference name (up to 5 characters) in the column Name.
Example 5: Copy and Paste a row in List Window multiple times
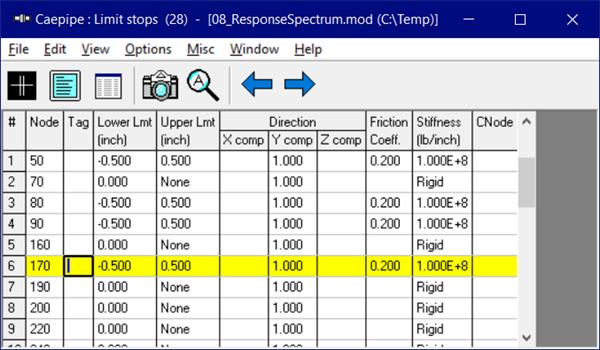
For Element types Valve, Bellow, Slip Joint, Hinge Joint, Ball Joint and Tie Rod and Data types Flange, Guide, Limit Stop and Skewed Restraint, Copy command available through “List window > Edit > Copy” will remember the data copied from a row for pasting the same multiple times. As an example, below figure shows how to Copy and Paste a Limit Stop data multiple times in a List window.
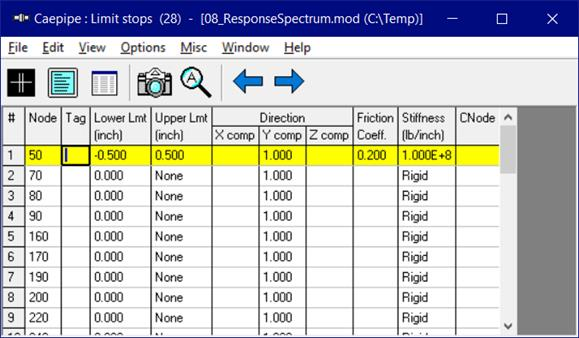
To Copy data of a Limit Stop at Node 50, from the List window for Limit Stop, position the cursor at row # 1 and invoke the Copy command through List window > Edit or press “Ctrl+C”.
Now, to paste the Limit Stop data copied multiple times, position the cursor at the required rows (row # 3, row # 4, row #6) and invoke Paste command through List window > Edit or press “Ctrl+V”. See figure given below for details.