Software Solutions
- CAEPIPE 3D+
- dataTRANSLATORS
- checkSTRESS
- HOTclash
- PEXit
- Pricing Request
- Download CAEPIPE 3D+
- Download Free Evaluation
- Download Free Review Module
- Customer Support
Engineering Services
- Design and Engineering
- INFOplant™ System
- Engineering Management
- List of Projects
- Project Gallery
- Project Videos
Learn More
Company Information
Installation Instructions
Thank you for downloading software from sstusa.com. Please carefully review and follow all instructions.
Before you begin installation please follow the two step "Create Environment Variables" instructions in item A. below
A. Create Environment Variables
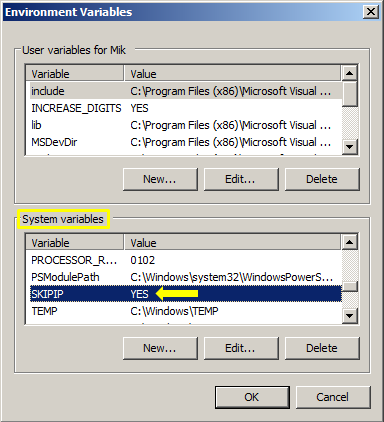
1. SKIPIP Environment Variable
- Open Windows Control Panel>System>Advanced Tab.
- Click on Environment Variables.
- From the System variables window (bottom section) click New and enter the following in the provided fields: Variable name: SKIPIP
Variable value: YES
2. SSTLM Environment Variable
- From the User variables window (top section) click New and enter the following in the provided fields: Variable name: SSTLM
Variable value: IP Number or Hostname of the computer where SSTLM is installed (example: 192.168.1.110)
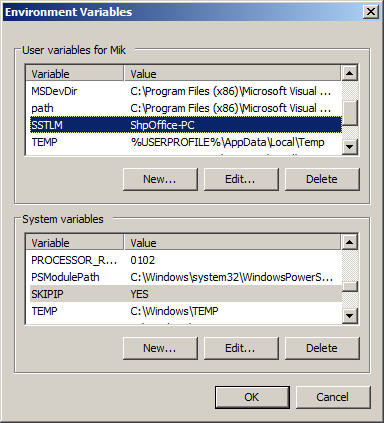
- Click OK twice to accept the changes to the Environment Variables section of your System Properties for this setting to take effect.
B. Setup Menu
Your unzipped download folder will typically contain the following contents.
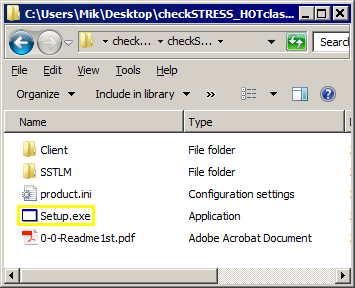
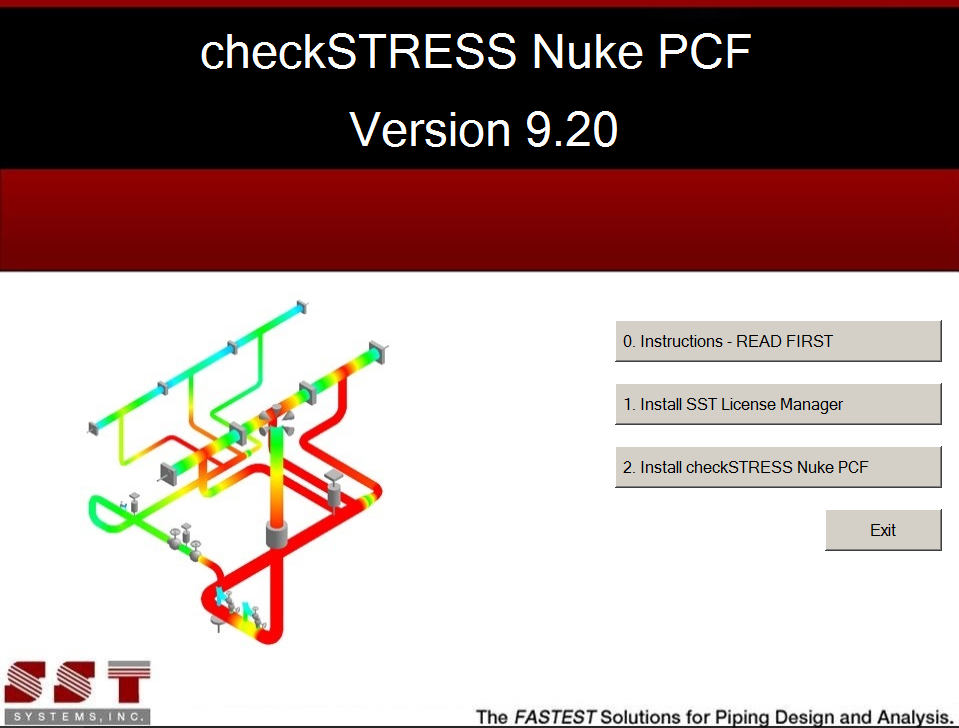
Click the Setup.exe icon found in your unzipped download folder to open the installation menu. For example, after clicking the Setup icon for checkSTRESS Nuke PCF, the installation menu will be as shown in the dialog below.
IMPORTANT NOTE: SST software mentioned in the installation instruction below requires .NET Framework 3.5. For Windows 7 and Windows 8, .NET Framework 3.5 is already installed by default. For Windows 10 and Windows Server R12, the .Net Framework 3.5 needs to be enabled using the option "Turn Microsoft features on or off.
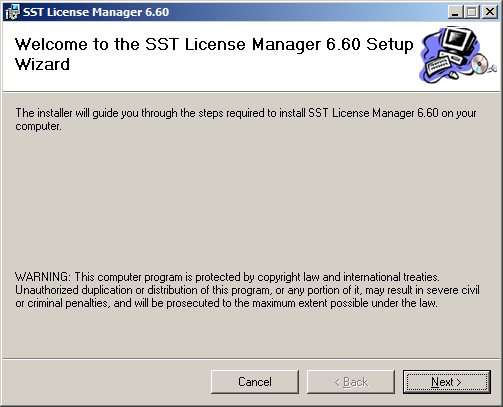
- Click "1. Install SST License Manager" button from the setup menu and follow the installation instructions to completion.
The dialog window below should appear.
- Click "2. Install (Name of the Product)" button from the setup menu follow installation instructions to install the Client software. As an example, for installing checkSTRESS Nuke PCF, click the button "2. Install checkSTRESS Nuke PCF" from the setup menu and follow the installation instructions to completion.
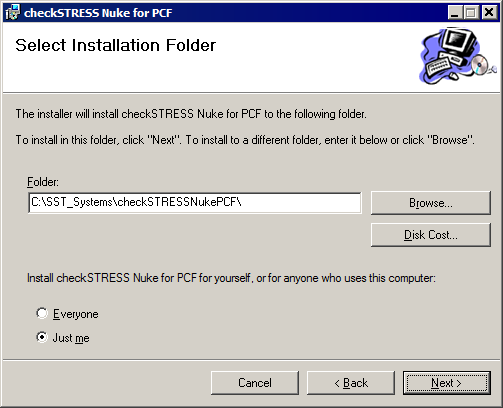
Note: For the program to work properly, avoid using space or special characters while entering the directory name or file name (correct format shown in example below).
C. Additional steps for specific products
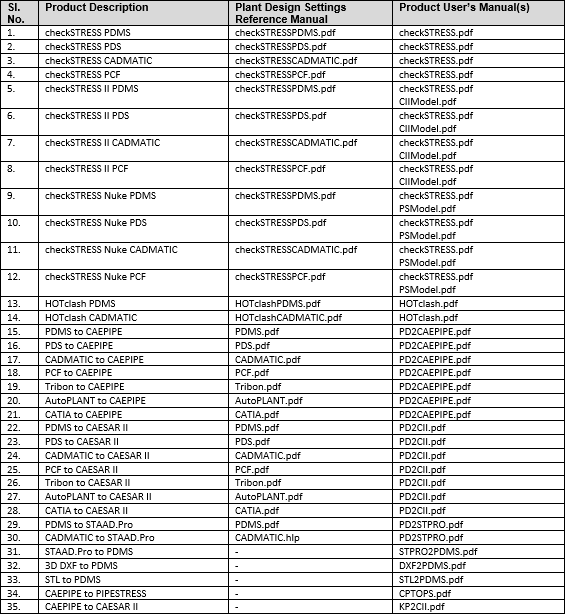
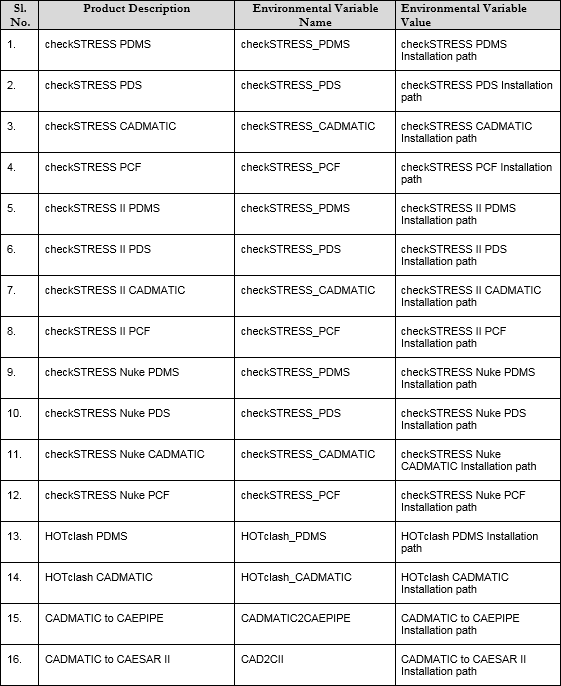
There may be additional settings that need to be carried out at the Source and/or Target software. These additional settings (including the information on setting the environmental variable given below) for each product are provided in the document listed under the column "Plant Design Settings Reference Manual" of the below Table. These documents are located in your software installation directory. It is important that the user goes through the Manuals listed below as they provide the details on how the "Source" software is being converted to the corresponding data in the "Target" software. For example, the documents "PDMS.pdf" and "PD2CAEPIPE.pdf" provide details on conversion of data from the Source software "PDMS" into the corresponding data in the Target software "CAEPIPE".
Once the product is installed as per instructions given above, the additional environmental variable required for each product as listed in the Table above is listed below.
D. Activation
After installation is complete, run the installed software from your Windows Start menu or installation directory. When you start using the software, an activation dialog box will open. As an example, "checkSTRESS Nuke PCF" Activation dialog is shown below.
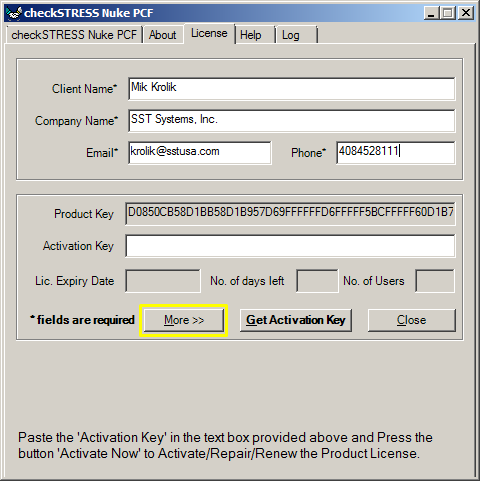
Fill out the client information portion at the top of the dialog box. Email your request by clicking on the "More" button and then "Send email" button, or simply copy and paste the ENTIRE product key into an email and send it to activation AT sstusa.com.
If you are located in India, please email your information to sales AT sstindia.co.in
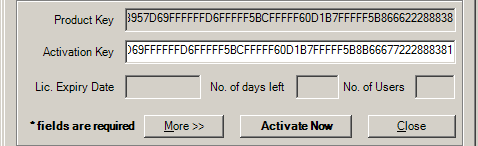
You may close the software at this point. You will receive an activation key by email. Once the Activation Key from SST is received, launch the translator software again and copy the Activation key into the Activation Key field and click on "Activate." This completes the activation process and provides full functionality of the software.
E. Troubleshooting
- If you get a ".NET Framework not installed" message, or if you run into any other problems not covered by these instructions then please visit our website for a list of troubleshooting solutions and downloads: http://www.sstusa.com/data-troubleshooting.php
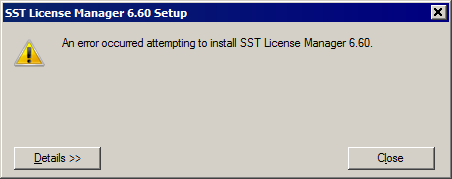
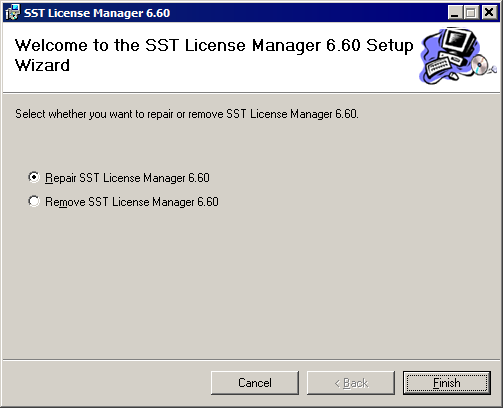
- If SST License Manager software is already installed on your machine, the dialog windows shown below will appear instead of the the one mentioned above.
Upon clicking the Cancel button from the first dialog window an error message window will appear.